When I first stepped into the haunting world of Once Human, I was immediately struck by its dual nature. On one hand, it's a deep and engaging survival game with an intricate crafting system that rivals many premium titles, especially impressive considering it's free-to-play. On the other, it's a world filled with unsettling horrors, bizarre adversaries, and soundscapes that keep you constantly on edge. It was in this eerie landscape that I discovered one of the game's most compelling and challenging mechanics, added in a patch about five weeks after launch: creature taming. To begin, I had to unlock specific taming memetics and craft essential tools like Tranquilizer Darts and an Animal Trough. The real journey, however, began when I set out to domesticate the wilderness's most formidable inhabitants, learning that some animals test a survivor's skill and patience far more than others.
🐇 The Deceptively Difficult Rabbit
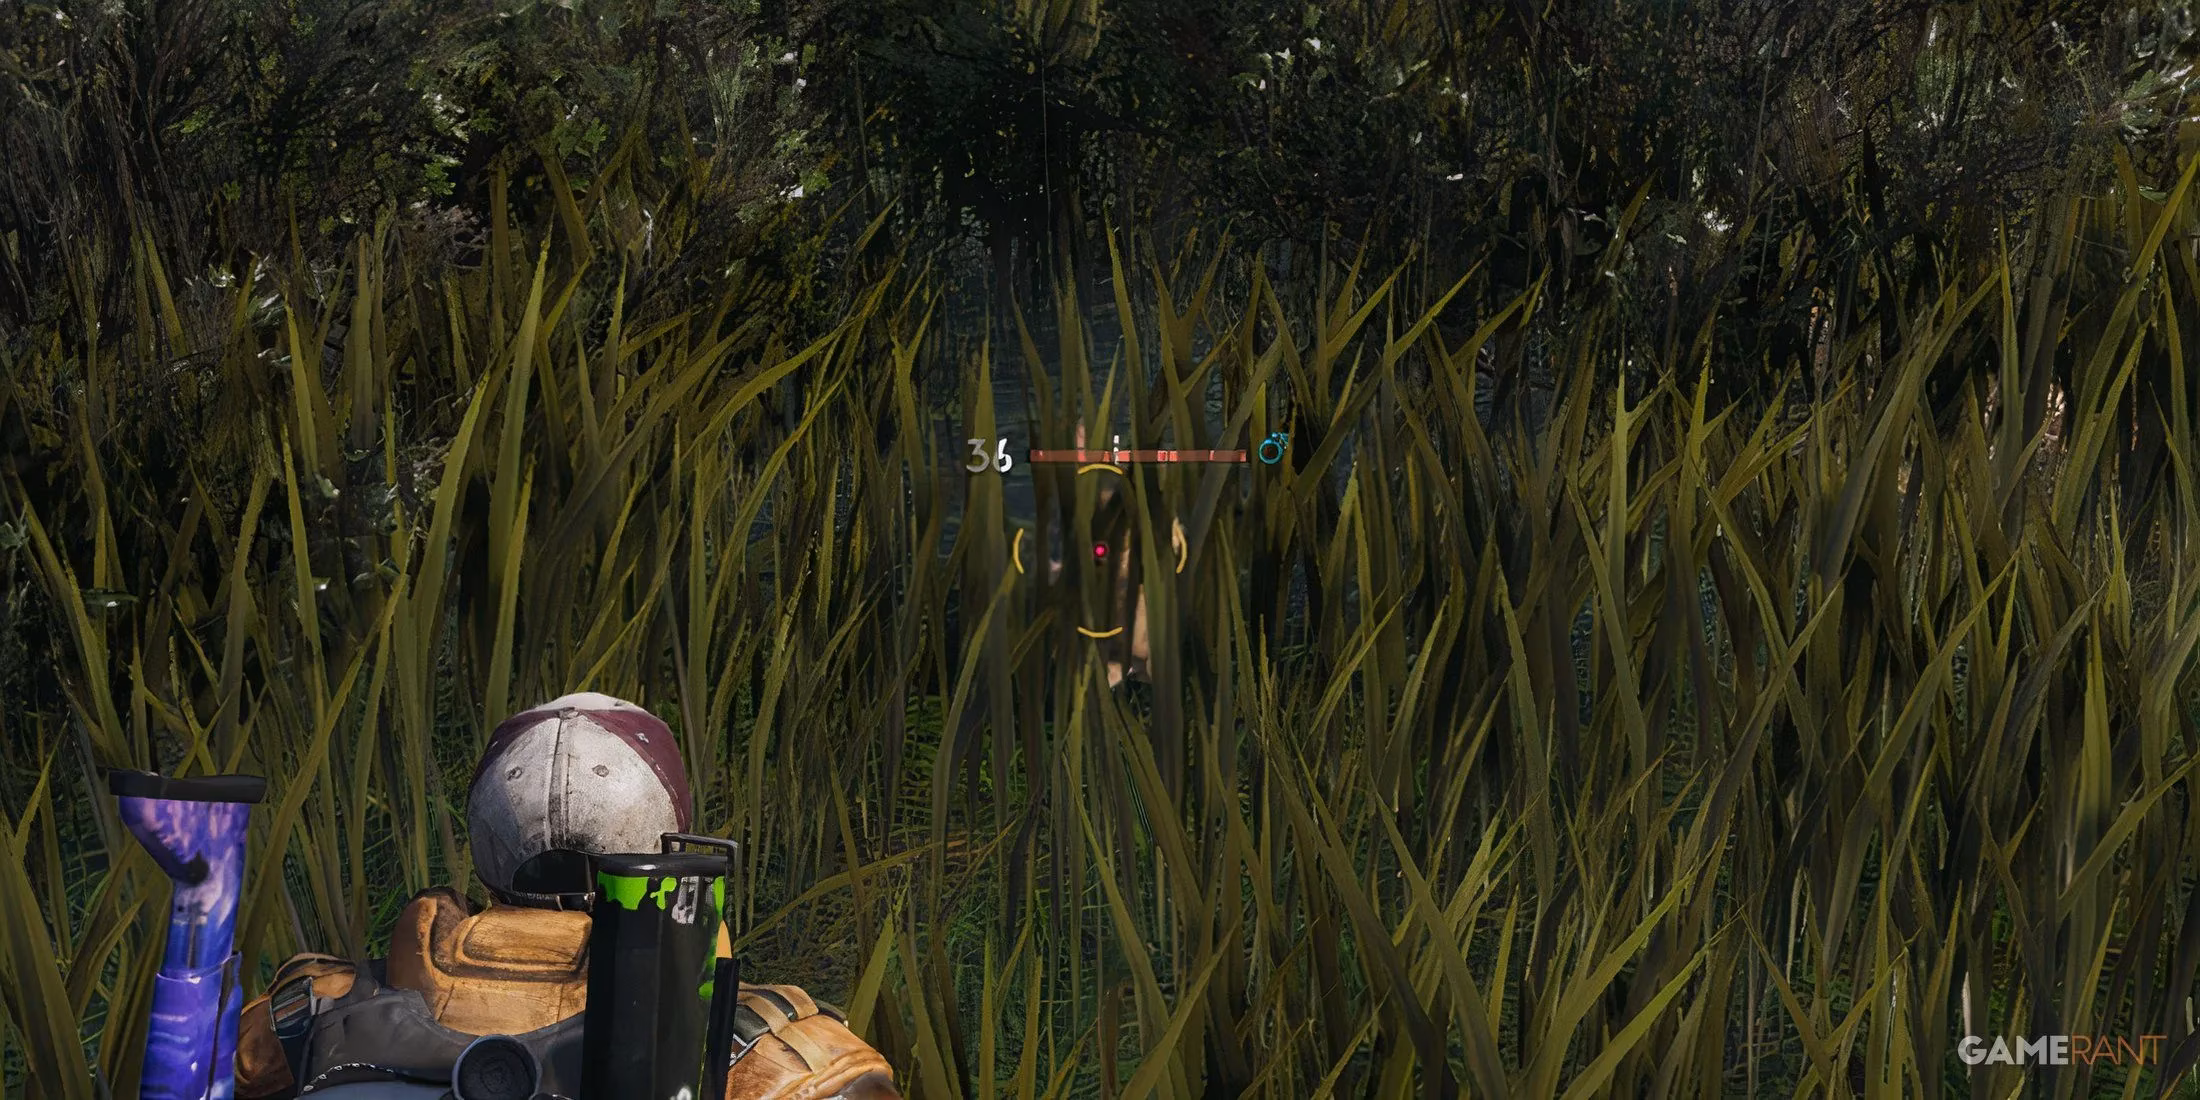
My initial assumption was that taming would start with large, fearsome beasts. I was wrong. My first true challenge came from one of the most common creatures: the rabbit. Found absolutely everywhere on the map, their ubiquity is a cruel joke. These small creatures possess a skittishness that is almost supernatural. The key, I learned through many failed attempts, is absolute stealth. I had to crouch and move with glacial patience. If a rabbit spooked and bolted—which happened often—I found that remaining crouched and waiting for it to settle was more effective than chasing. Persistence eventually allowed me to get close enough to initiate the taming process. Once secured in a pen, they became a reliable, if humble, source of rabbit meat for cooking. Their difficulty lies not in power, but in their incredibly high awareness and flight response.
🦌 The Skittish Deer Herds
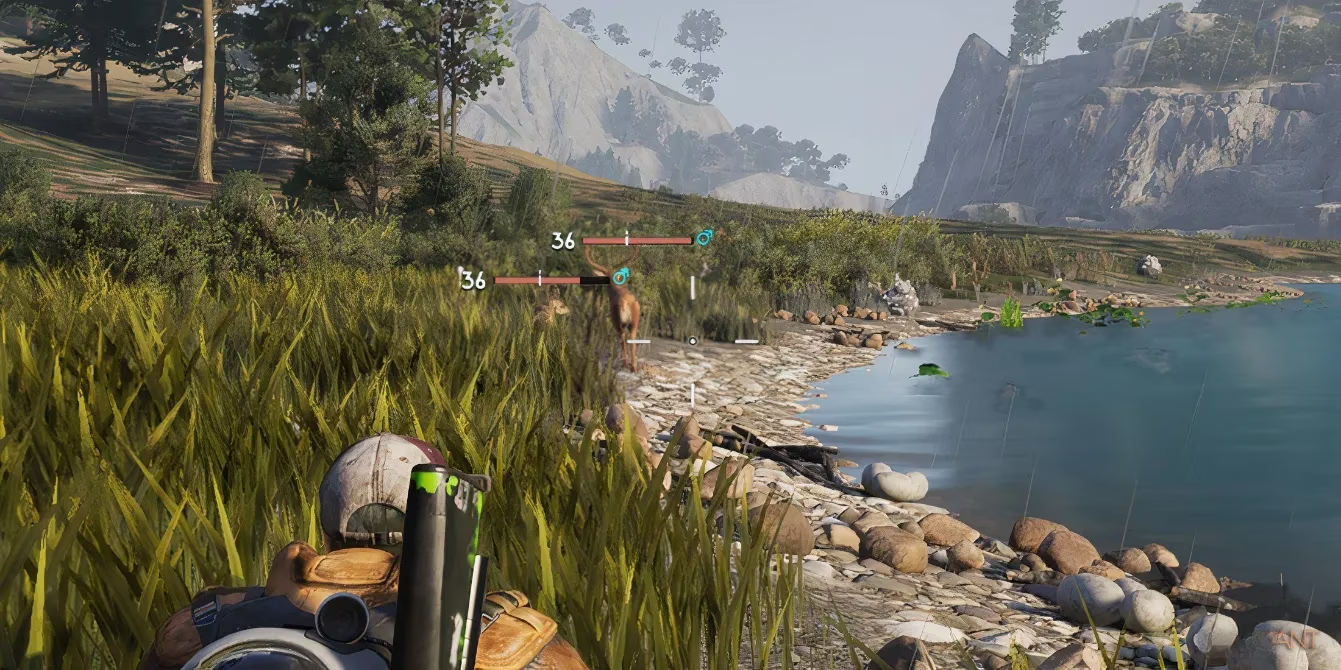
Building on my rabbit-taming "skills," I sought out deer, common in every zone up to and including Chalk Peak. Like rabbits, they are easily frightened. My strategy evolved to focus on herd dynamics. I learned to scan the edges of a group, looking for an individual that had strayed from the main body. Targeting this loner minimized the risk of startling the entire herd into a panicked stampede. For the more aggressive tamer, an alternative method is to use a bow to thin the herd's numbers before attempting to calm a remaining deer. This approach requires precision to avoid killing the intended target, adding a layer of tactical complexity.
🐗 The Aggressive Boar Trio
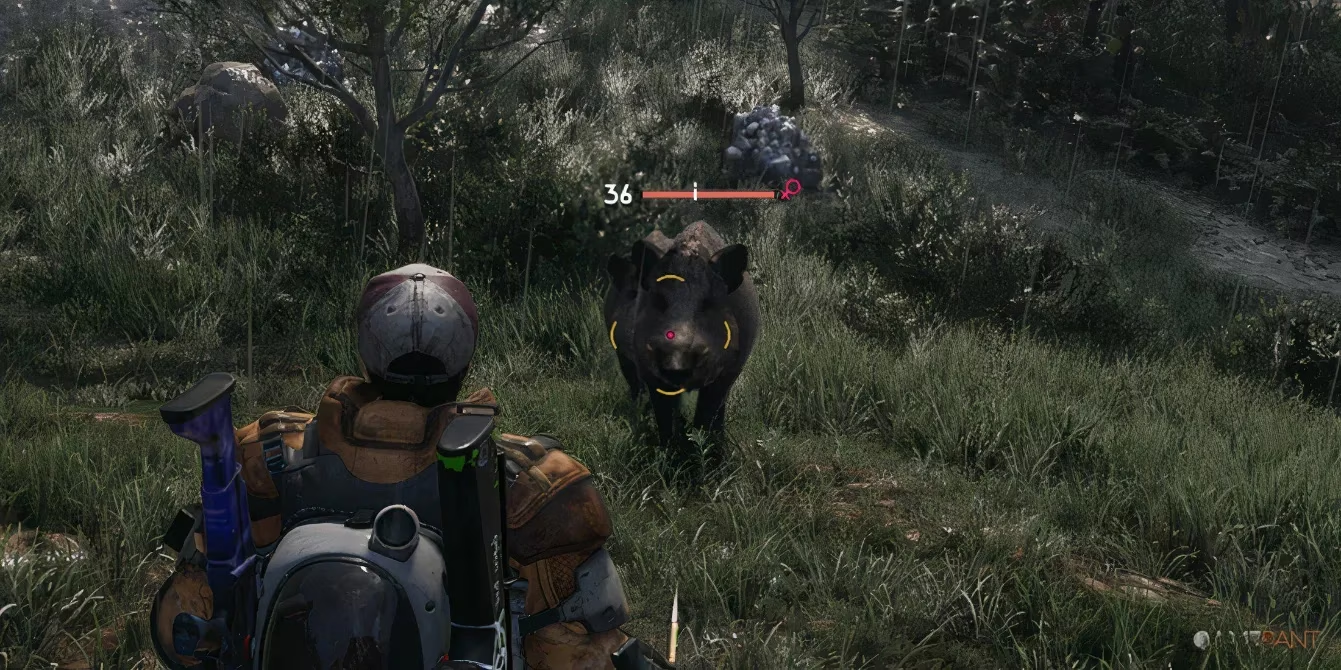
The boar presented my first lesson in managing outright aggression during taming. Found in groups of three up to Chalk Peak, these creatures are far from passive. Engaging a full trio is a quick path to a respawn screen. My successful method involved careful observation, waiting for one boar to wander a significant distance from its companions. I would then approach from the opposite side of the group. Even a solitary boar will fiercely attack during the taming process, so being prepared to tank significant melee damage is crucial. The difference is that surviving one boar's assault is manageable; surviving three is nearly impossible without end-game gear.
🐐 The Herd-Minded Desert Goats
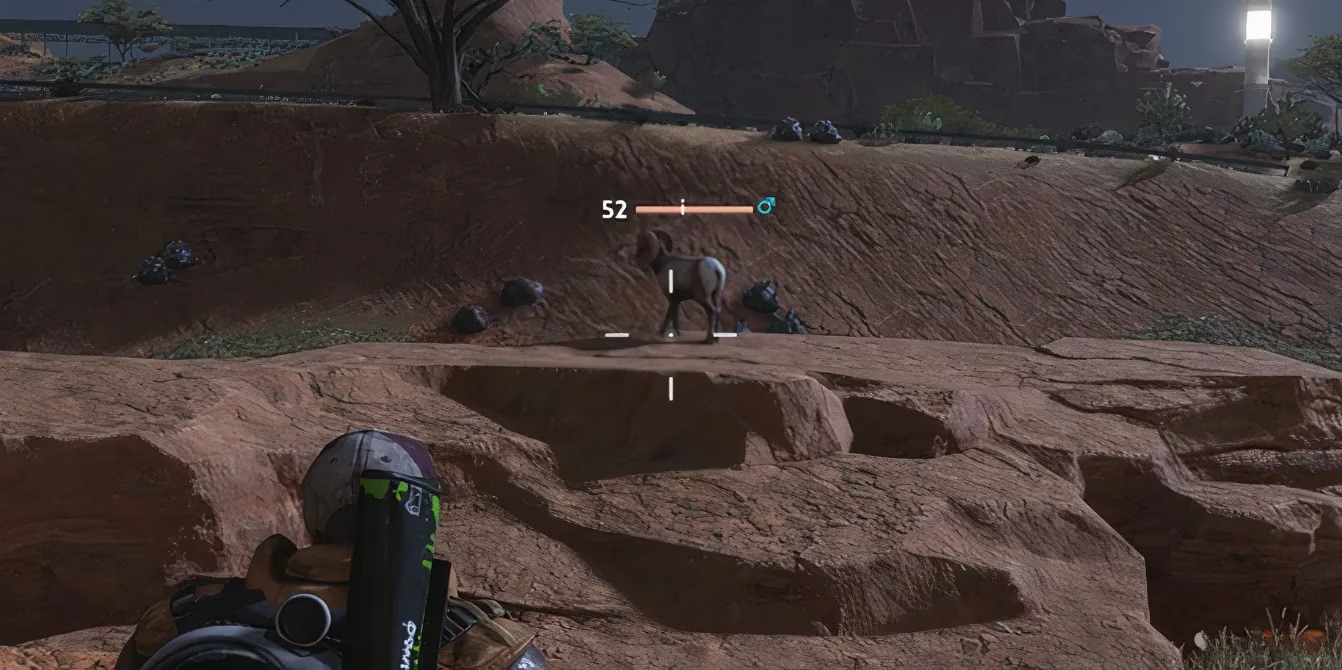
Venturing into the desert regions past Red Sands, I found that deer were replaced by various goats—rams, ewes, and kids. These creatures inherited the deer's skittishness but often spawned in larger, more tightly-knit groups. The herd mentality here is extreme; startling one goat often triggers a chain reaction, sending the entire group fleeing. My tactic shifted to searching for smaller clusters or, ideally, a single goat that had isolated itself from the main herd. Patience in locating the right target was more important than stealth in the approach itself. Taming a goat that isn't directly influenced by the herd's panic is the only reliable method.
🐻 The Powerful Lone Bear
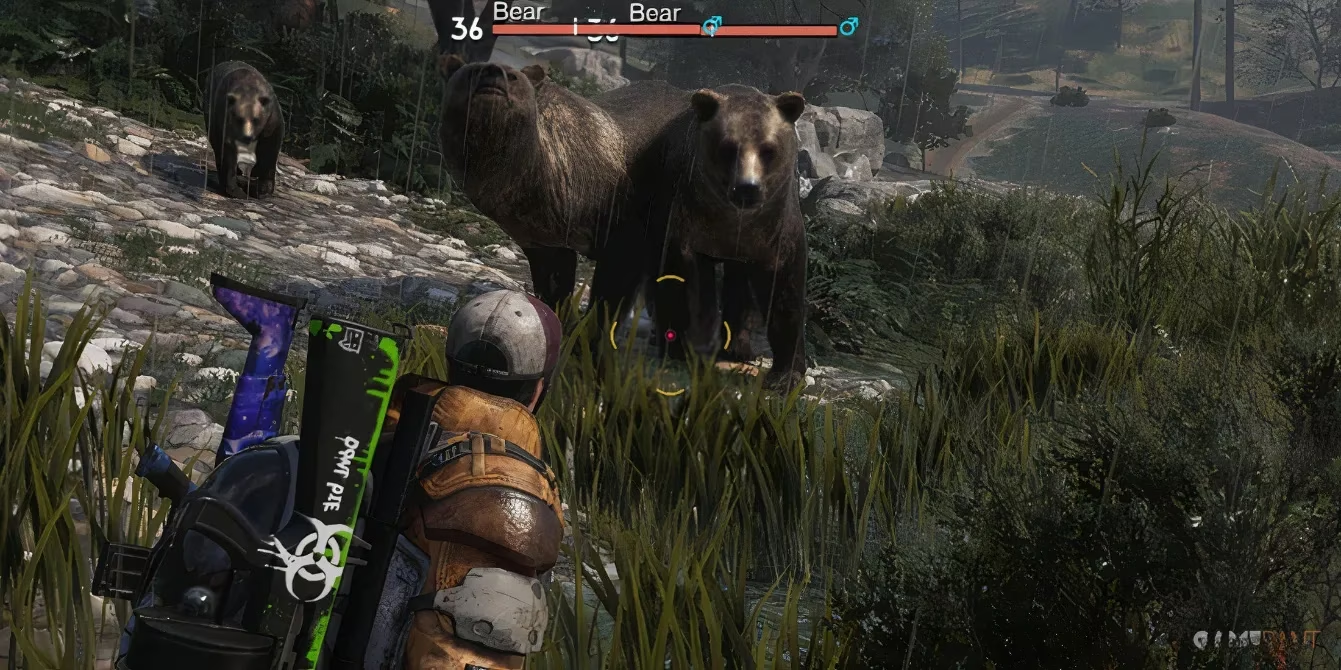
For many tamers, the bear is a coveted prize, symbolizing strength and resilience. They are most commonly found in the Chalk Peak zone, with a notable concentration in the hidden cave at the peak's summit. These creatures are powerhouses, dealing substantial melee damage. My early attempts taught me that gear and level matter immensely here. The safest approach is to seek out a lower-level bear that is spawning alone. For max-level players with robust gear, taming any bear becomes feasible, but it remains a battle of attrition where you must outlast their powerful attacks throughout the taming process. It's a true test of your survival build.
🐊 The Aquatic and Aggressive Crocodile
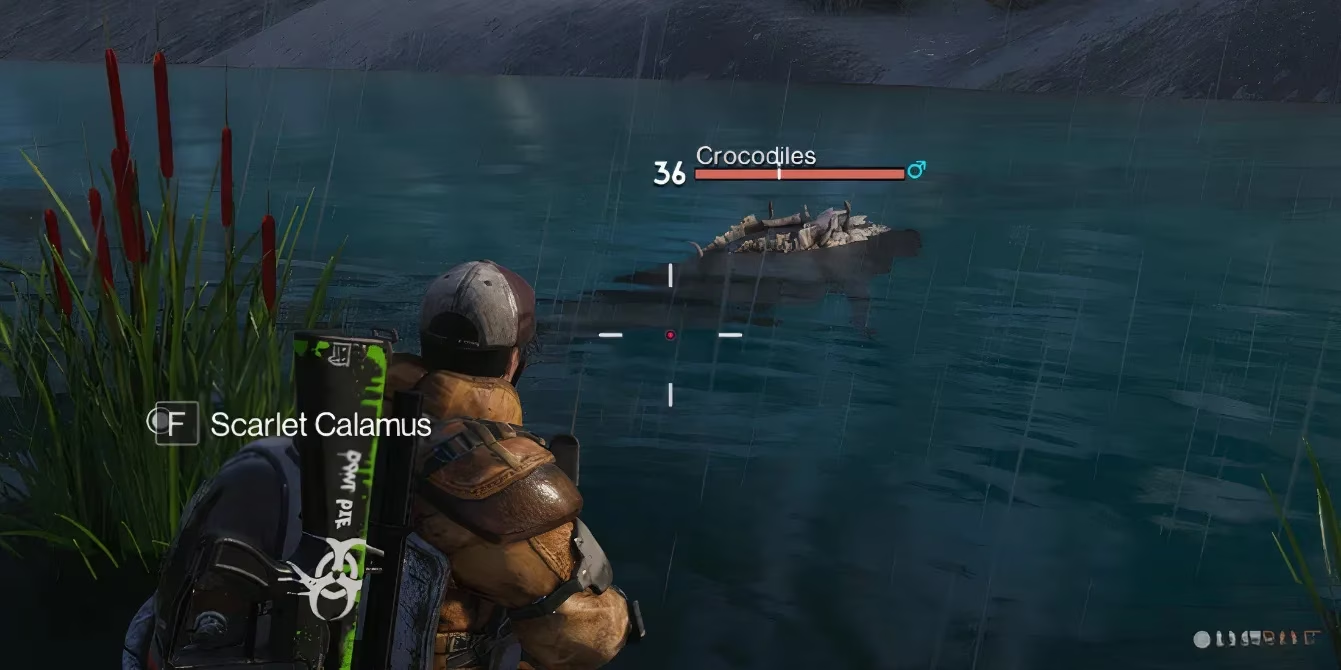
Few creatures are as frustrating to locate and tame as the crocodile. They are solitary spawns near water, and their low, flat profiles make them masters of camouflage in long grass. My search led me to the riverbanks of Chalk Peak. Their aggression level is extremely high, guaranteeing a fierce battle. I discovered a critical tip: crocodiles seem less hostile when encountered already lying in the water. If you find one in this state, the taming process, while still dangerous, is slightly more controlled. If found on land, be prepared for a relentless assault that demands high durability and healing items.
🐺 The Pack-Hunting Wolves
The ultimate test of a tamer's combat and strategic skill comes from wolves. Appearing in every zone from Chalk Peak onward, they hunt in coordinated packs of three and are supremely aggressive. You don't find wolf packs; they find you. The core challenge is their pack mentality; there is no way to cleanly isolate one wolf. You are presented with two hard choices:
-
Tank the Entire Pack: Commit to taming all three simultaneously, a feat requiring incredible defensive capabilities and healing.
-
Cull the Pack: Engage in combat and eliminate two of the wolves, leaving a single target to tame. This requires careful damage control to avoid killing your intended tame.
This forced me to make a strategic decision before every encounter: was I building an army, or did I just want one powerful companion? Wolf taming is less about stealth and more about raw, calculated combat prowess.
📋 Taming Difficulty & Strategy Summary
| Creature | Primary Zones | Key Challenge | Recommended Taming Strategy |
|---|---|---|---|
| Rabbit | Everywhere | Extreme skittishness | Crouch, be patient, wait after it runs. |
| Deer | Up to Chalk Peak | Herd flight response | Target a loner at the herd's edge. |
| Boar | Up to Chalk Peak | Aggressive group attacks | Isolate a wanderer, tank single target. |
| Goat | Red Sands & beyond | Large, skittish herds | Find small groups or isolated individuals. |
| Bear | Primarily Chalk Peak | High melee damage | Target low-level, solo spawns; need good gear. |
| Crocodile | Up to Chalk Peak | Hard to find, very aggressive | Search riverbanks; target ones in water. |
| Wolf | Chalk Peak & beyond | Coordinated pack aggression | Choose: tank the whole pack or cull it first. |
My journey through the aberrant wilderness of Once Human has taught me that taming is more than a side activity; it's a core survival skill that demands adaptation, observation, and courage. Each creature, from the humble rabbit to the fearsome wolf pack, requires a unique approach that blends stealth, combat, and terrain knowledge. The system adds a rich, rewarding layer to the game's already deep survival mechanics, turning every corner of the map into a potential opportunity or a deadly challenge. In this world, your best ally might just be the monster you learned to calm.
Comments